If you think that rust is a recurring topic here, you'd be right. I suppose I could rename this blog The Power of Rust and play an adapted version of Huey Lewis' The Power of Love. But I won't - you'll just have to imagine it.
Last time I described how I found the keel, but still didn't know much about it. Until I had extracted it, it remained an unknown large, heavy lump of rusted metal of unknown dimensions and dubious weight, sandwiched tightly between the side-boards that made up the keel box. I did know it pivoted about a fixed point near the front of the keel box, which indicated a keel pin of some description. All I needed to do, then, was knock out the keel pin and the keel would drop out. Wouldn't it?
I had just finished building the car port with two sliding beams fitted for a boat sling. The first task was to get the boat home (with the help of a friend, a Toyota 100 Series Landcruiser and a generous towing capacity) and suspend the boat in mid-air. Not having Yoda's levitational capacities, and not having any serious lifting gear, I used a couple of scissor jacks and a pile of free off-cuts from the timber yard bin at the nearest hardware store . To keep it suspended, I used my sliding beams and two sets of lifting slings and tie-down straps, all rated at 1000kg. The lifting slings were of a fixed length and the tie-down straps gave me some adjustment. I found that although tie-down straps are good at tying stuff down (hence the name), they don't have a lot of travel in them, so are less good at lifting things up. It was a case of lifting the boat up a little with the tie-down strap, getting some shoring in underneath, undoing the tie-down strap and taking in the slack, tightening the tie-down strap and starting again. The end result was getting the boat 600mm off the ground, which was just enough to extract the trailer from underneath and gave, hopefully, enough clearance to get the keel (of uncertain width) out. I also used a lot of foam padding, made from neoprene sheets and cable-ties to protect the hull from chafing.
 |
| Austral 20 on boat sling in carport before the addition of safety shoring under the boat |
The next issue was knocking out the keel pin. This came out fairly easily, with some persuasion applied via a claw hammer. But, the keel remained stuck. Curiously, the keel could still be pivoted around the keel pin hole, as if the keel pin were still there, but it would not slide out of the bottom of the boat. At least this gave me my first clear sight of the bottom part of the keel, even if the top part remained hidden inside the keel box. It had some rust, but didn't look too bad.
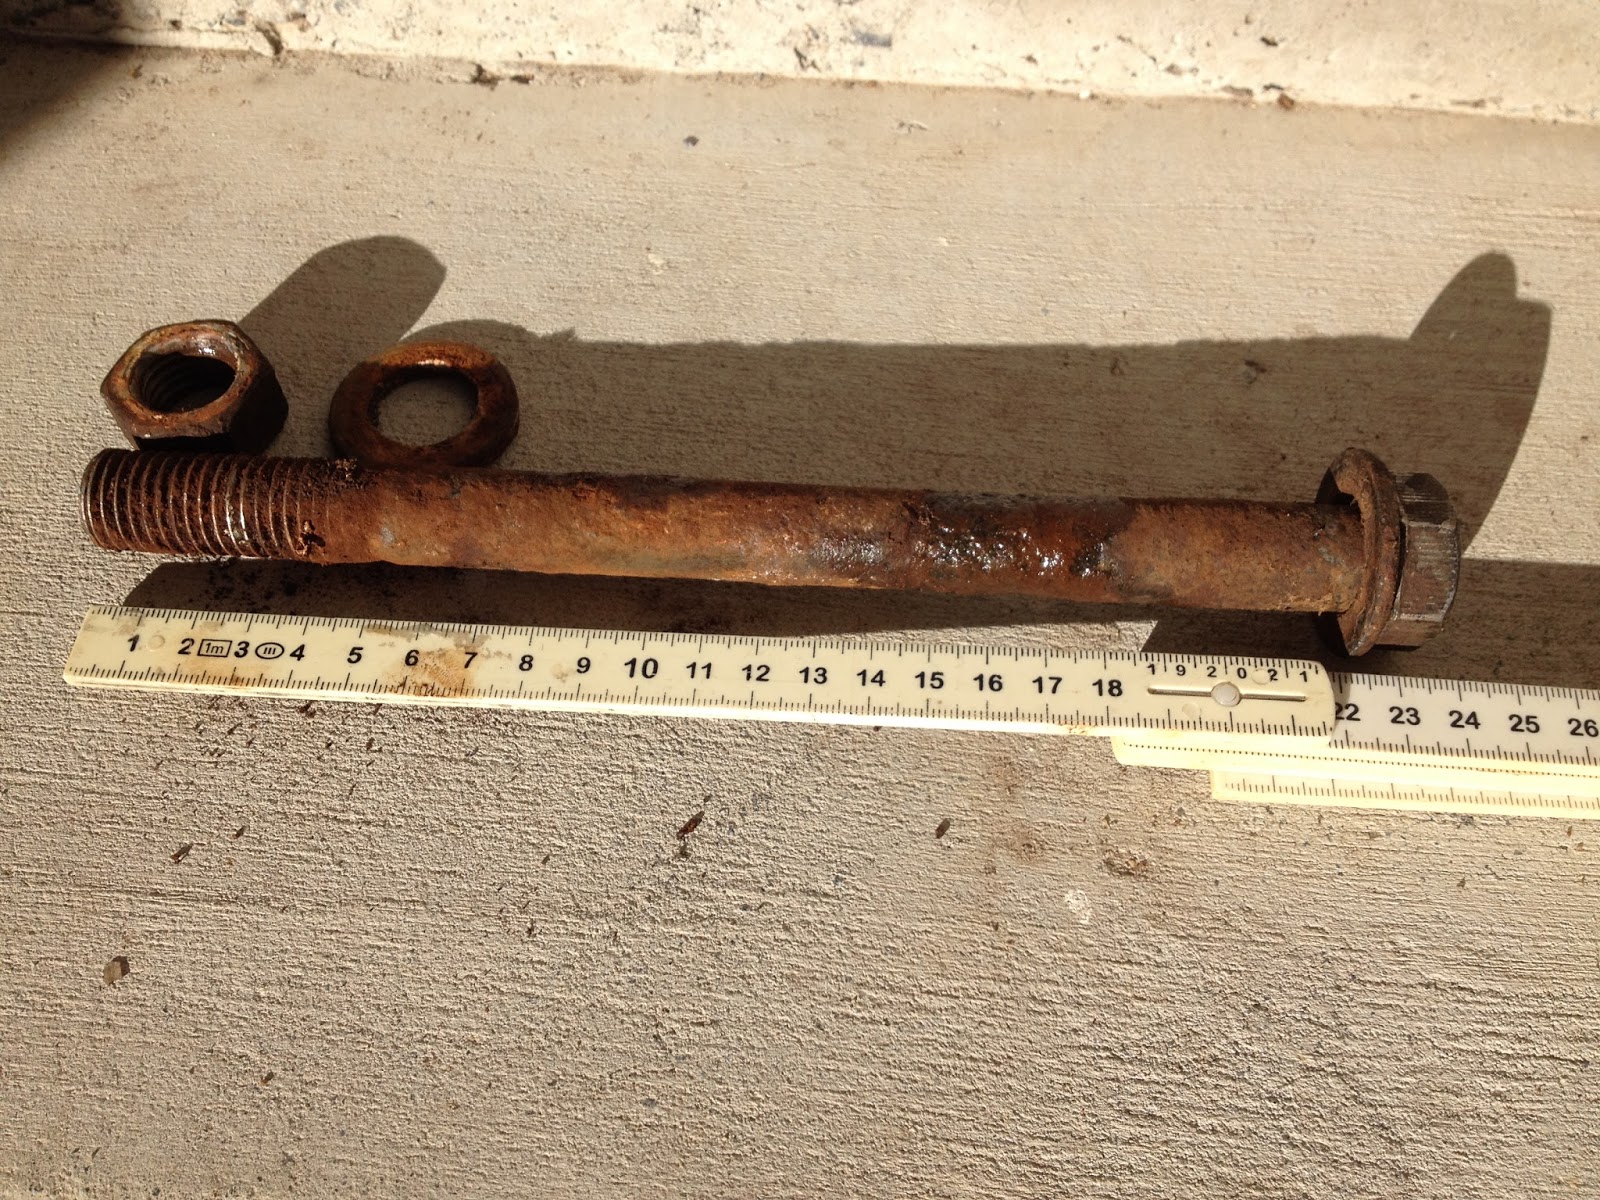 |
| Austral 20 keel pin - 3/4" steel bolt |
 |
| Austral 20 keel before removal |
I tried hitting the keel with a hammer, but it didn't budge. I tried hitting it with a bigger hammer - a sledge hammer on loan from a friend - until a neighbour asked me to stop making a noise like I was hitting a massive metal plate with a massive hammer. I explained that that was exactly what I was doing, but I was getting nowhere and she had a point about the noise. So, I stopped and had a think. My wife wondered if I should take it to someone who knew what he was doing, but I decided to podger on.
There was something stopping the keel from dropping out of the bottom of the keel box. I decided the most likely culprit was rust. But, how could I get to it?
An alternative strategy to dropping the keel out of the bottom of the keel box was to lift it out of the top. There was the advantage that the top of the keel box was not as stiffly constructed as the bottom, so that lifting the keel would be undoing a wedge rather than tightening it. However, a full lift meant getting some (expensive) lifting gear inside the cabin and finding two points on the keel to safely attach to. I also needed to attach the lifting gear to something other than the GRP cabin roof. There was only one good point of attachment on the keel - the horn at the top of the keel to which the keel-raising line was attached via a shackle.
I struck upon a hybrid strategy - lift the top part of the keel out of the keel box and clean off the rust before dropping the whole thing through the bottom of the keel box. I found I could do this by using some scrap timber as a fulcrum and see-sawing the keel into position, locking it into place by using the boat's backstay to tie the top of the keel to the rear sliding beam in my carport. There was, fortuitously, a clear line of sight from the top of the keel, through the companionway to the beam. I also needed a few safeties to prevent the whole thing becoming a highly efficient guillotine at any of those critical moments when I had my body-parts in the direct line of swing.
 |
| Austral 20 - using the weight of the keel on a pivot to unlock the top part of the keel. To operate, pull the string... |
 |
| After pulling the string ... the back goes down and the front goes up, unlocking it in the keel box. Jack up the back of the keel, relocate pivot further after aft and repeat ... until |
 |
| ... keel is fully dislocated but upright. |
The final result got the top of the keel just clear of the top of the keel box, where I could get to the rust. As I suspected, there was plenty of rust on the sides of the keel, and it formed a number of "warts" on either side. I chipped away at the warts with a sacrificial wood chisel and attempted to saw off some of the rust-warts below the top of the keel box.
 |
| Austral 20 keel: top of keel levered out of top of keel box and suspended by rope attached to keel horn. Showing rust-warts on port side. |
 |
| Austral 20 keel: top of keel levered out of top of keel box and suspended by rope attached to keel horn. Showing rust-warts on starboard side. |
After chiselling the rust warts back as far as I could, I decided that, rather than lowering the keel gently down through the keel box, I'd cut the supporting rope and let it drop. I reasoned that I was substituting a 7 kg sledge-hammer with a 150 kg keel-hammer (it actually turned out to be heavier, as I'll describe later) to force it onto the ground. My first attempt failed. The keel got stuck in the keel box again. I had to lever it back into position, chip and scrape off more rust and try again. On the second attempt, the thing finally dropped clear of the boat and I gave a loud cheer. Actually, it was a rather muted cheer, because I'm English and have a very English sense of restraining one's emitions. It was if the boat had suffered a two year constipation, and I had got it to finally ... er ... deliver. The attached video shows this moment of triumph after five days' full-time travail. It might not be the most exciting video ever posted on the internet, but it was a mighty relief for me.
Looking back inside the now-empty keel box, I found that my earlier suspicions were correct. It was all about rust. Interestingly, the rust had formed rust-warts or nodes on the sides of the keel, and these had ground out grooves on the inside of the keel box. The tracking of the rust-warts in their grooves allowed the keel to pivot, but prevented it from dropping. There was nothing I could do about the grooves in the keel box, but I could get the rust-warts off the keel, and that is what I did next.
 |
| Austral 20 inside of keel box showing grooves ground into the sides of the keel box by rust warts on the keel. The grooves are a few millimetres deep and have worn through the white top layer into the clear GRP layer below. |
 |
| Austral 20 inside of keel box showing grooves ground into the sides of the keel box by rust warts on the keel. The grooves are a few millimetres deep and have worn through the white top layer into the clear GRP layer below. |


No comments:
Post a Comment