Several small modifications need a mention in this post.
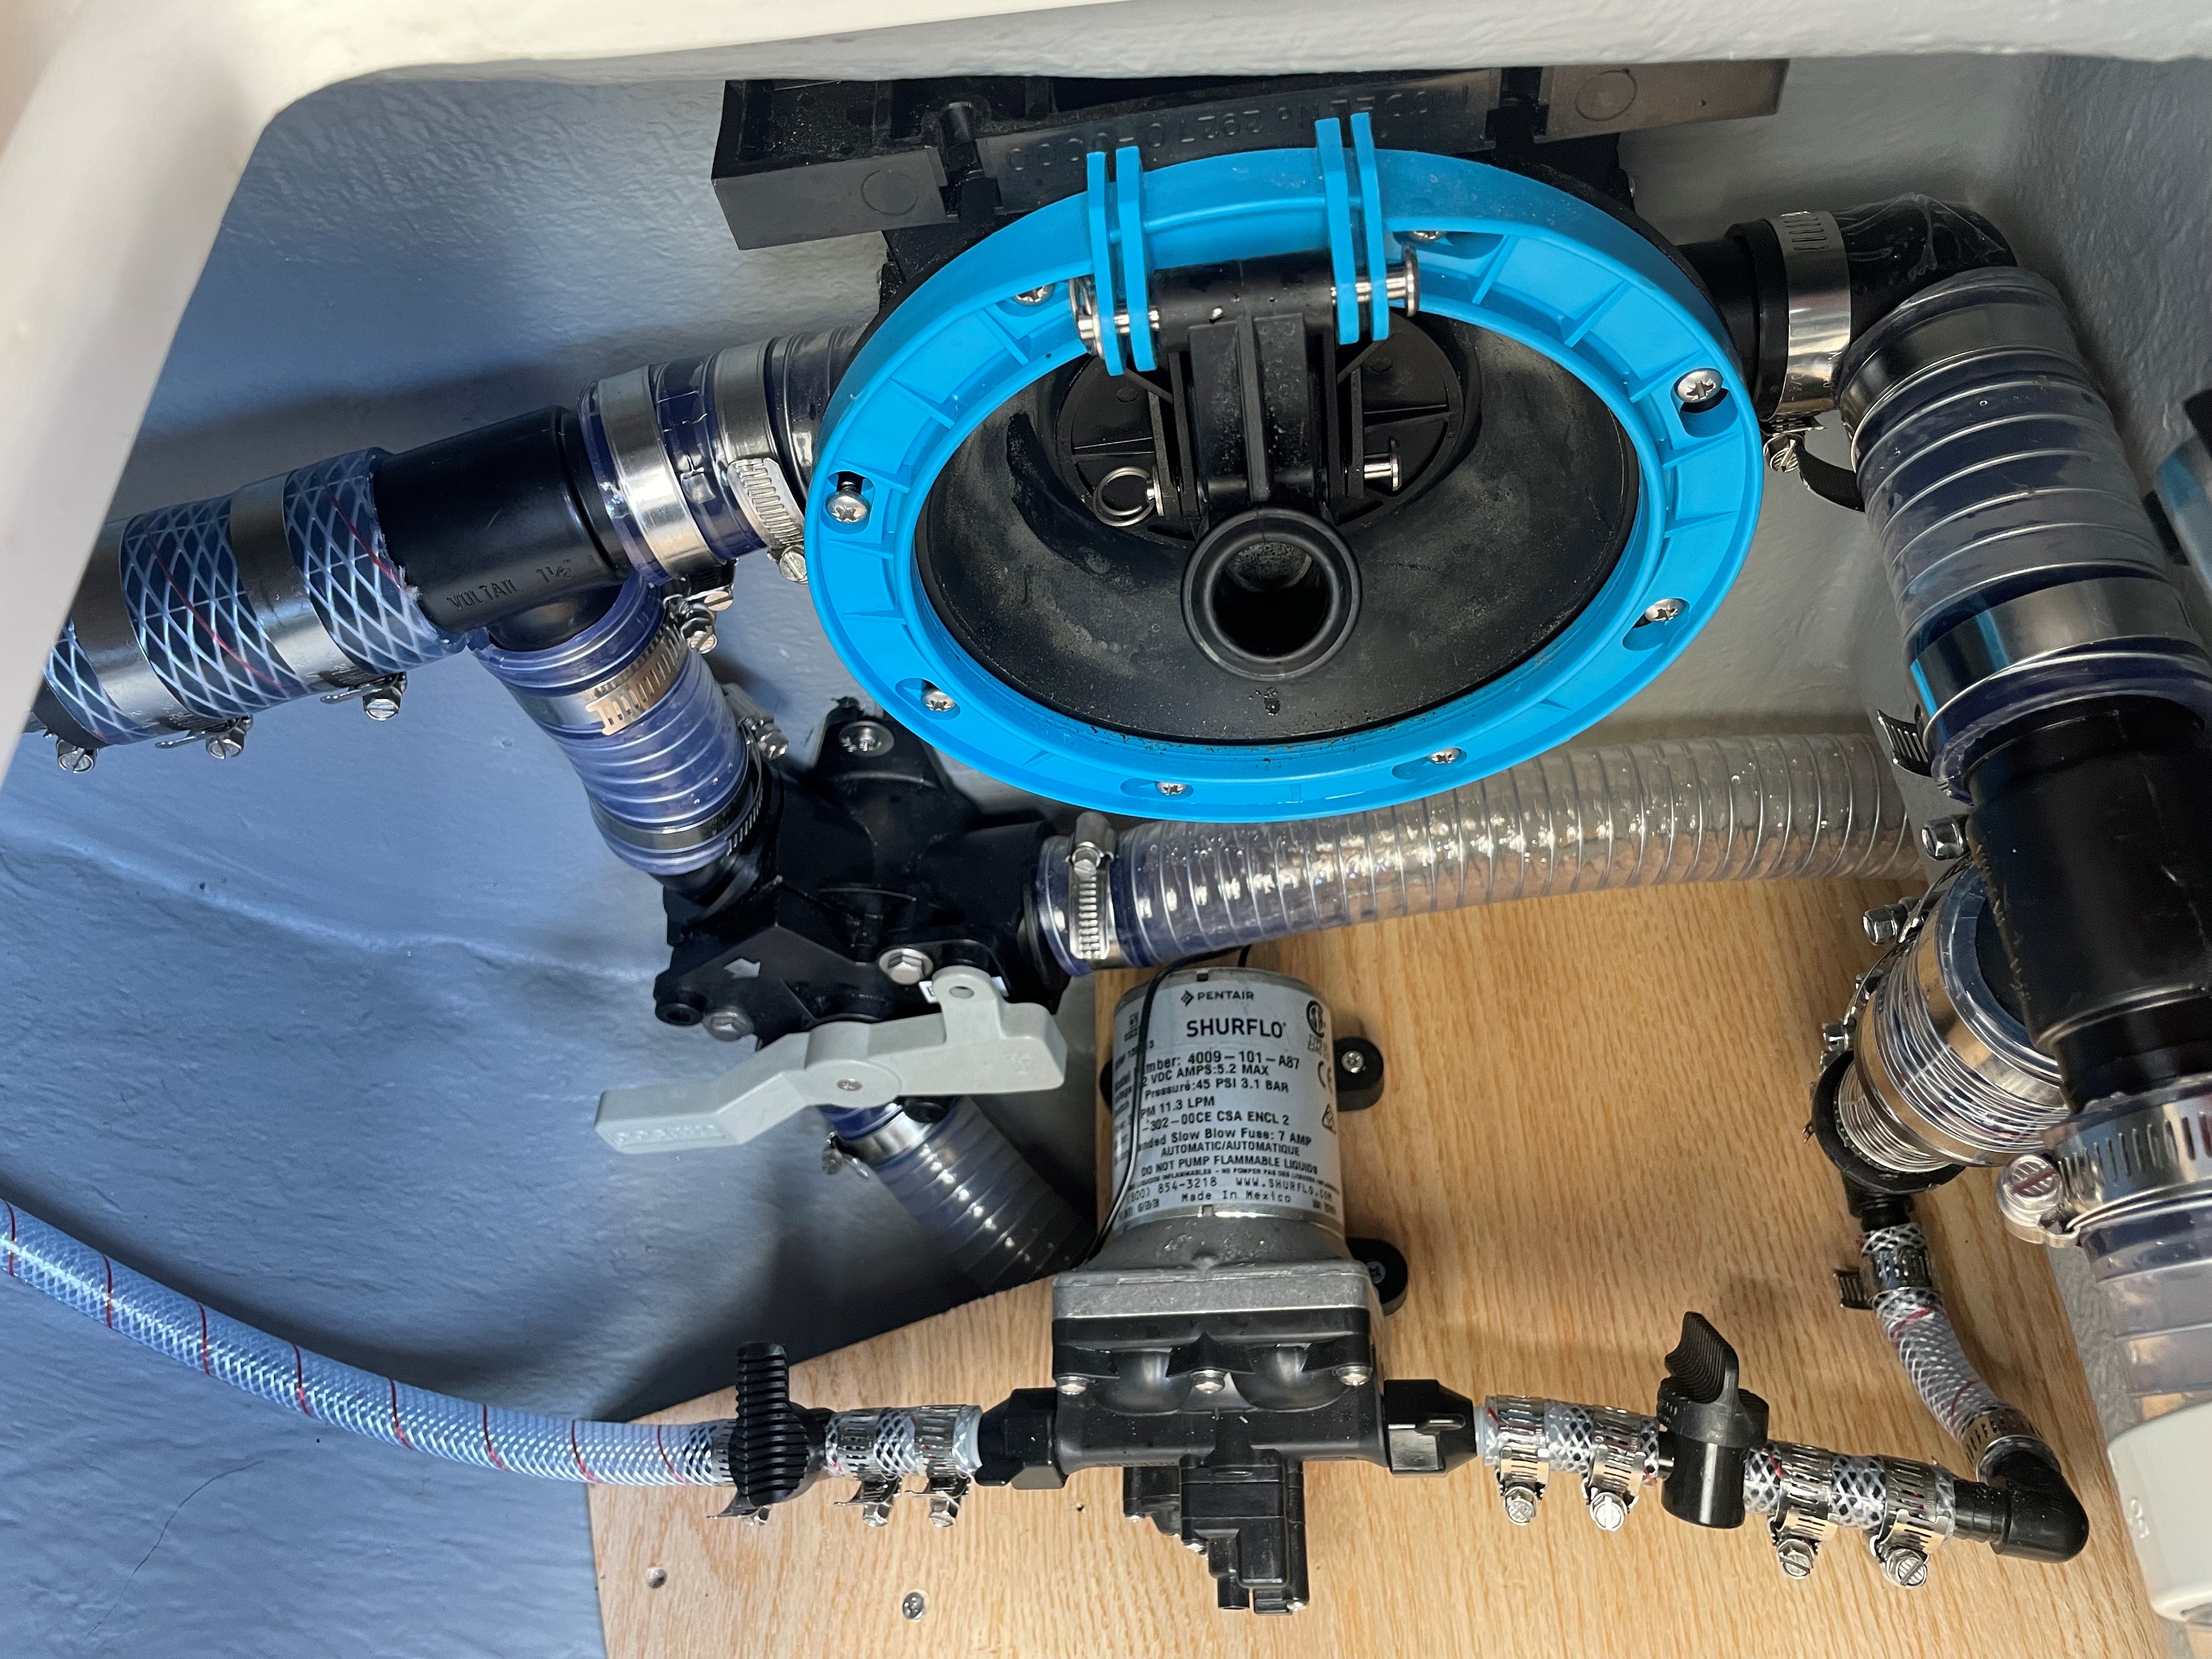
The first is the answer to the question "can you fit a stove box into the port locker that is big enough to house a Maxie metho burner". The answer is "yes" but it is a remarkably tight fit. In Episode 47, I showed the shrink-fitted, final version of the stove box and in Episode 48 I showed the major surgery needed to the plumbing for the bilge pump to get the stove box into the locker. Some further joinery was needed to get the box to sit nicely in the locker without ratting around and scratching the locker walls. Today, I shaved the edges of the floor to improve its fit and added some timber trim for the stove box to sit in, see Photos 2 and 3 below. With the handles, the box now lifts nicely in and out of the locker, and the trim shows the space left for more stuff in the locker. The lid closes fully, with a tight fit over the handles. It has been a major three-dimensional puzzle to solve - the locker lid is a kind of fat "L" shape, the locker floor is the curved hull, the locker walls are vertical but don't line up with the access hole in the top, and so on.
I tested the stove box in the Bay to Bay Race, and am happy to report that it works well, as shown in Photo 1 below.
The second modification is to the tiller. The Cygnet 20 has a rudder downhaul line on the starboard side, which passes through a cheek block over the pintles and is made off on a horn cleat on the tiller. The downhaul line is the red line in Photo 4 below and it keeps the rudder down when under way. This could be the only design flaw with the Cygnet 20. The problem is that the securing arrangement for the downhaul line is too strong. When the rudder hits the bottom, it loads the downhaul line but, because the line is securely made off on the horn cleat, the force rips the cheek block out of the tiller, causing an ugly tear-out in the timber. I ripped out the cheek block twice - once when loading the boat at the ramp (I had forgot to let off the downhaul line), and another when hitting a sand bar. With the sand bar, the keel was fine, as it simply flipped up, but the tiller suffered an ugly tear, the cheek block was destroyed and a lump was chipped out of the gel coat on the hull. Tired of trimming off torn wood and repairing the screw-holes in the tiller with epoxy filler, I replaced the horn cleat with a CL257 Auto-Release Clam Cleat. One good thing about this cleat, as I found out, is that it uses the same holes as the horn cleat it replaces. I have yet to test it, but it should let go of the downhaul line before the next cheek block gets ripped out the next time I run into shallow water, or do something equally unplanned or stupid.
The third modification was to add a breadboard/cutting board fin to the outboard motor, which should stop the prop striking the rudder when things go pear-shaped (again). See Photo 5 below. Even with the linking arm between the tiller and outboard, I have managed to dislodge the motor so that the prop struck the rudder, gouging some marks into the side. The breadboard fin should keep the necessary distance between prop and rudder. It is bolted onto the outboard casing which, I found out, is aluminium. I squeezed some Tefgel into the holes before inserting the stainless steel bolts, and used nylon washers to try to avoid electrolytic corrosion (if not electrically isolated, seawater turns dissimilar metals into a small battery, corroding the less noble of the two metals).
Finally, I found I needed the fourth modification during the heavy rain in the Bay to Bay race. Previously, I had mounted the depth-sounder display on a hinge so that it swung out into the companionway. However, with the display visible in the companionway (needed to check the depth), it protruded so far that I could not insert the upper washboard. The gap, where the upper washboard should have been, let a fair amount of rain got into the cabin. My solution was to re-mount the display a little higher and further forward, so that I could insert the upper washboard and still read the display (the upper washboard being transparent). My plywood washboard (see Episode 51) will need a window, but it will keep the rain out.
 |
| Photo 1: Stove box in use at Garry's Anchorage in the Bay to Bay Race |
 |
| Photo 2: Port locker with timber trim for stove box |
 |
| Photo 3: Port locker with stove box stowed |
 |
| Photo 4: Tiller with auto-release clam cleat |
 |
| Photo 5: Breadboard fin on outboard prop |